Agent photo handling
How to add, edit and resize agent photos for brochures and email footers.

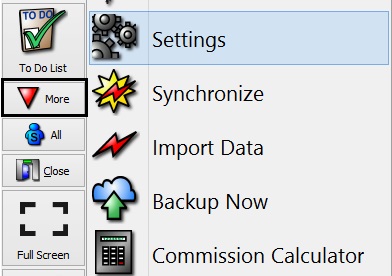
1. Open the More menu and click Settings
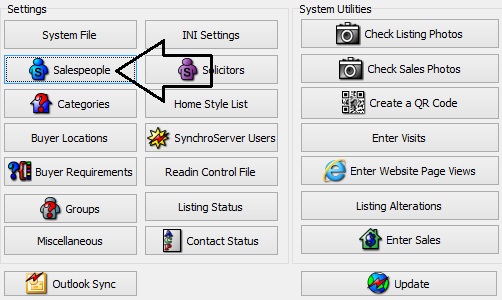
2. Click Salespeople
Tip: You can Lookup a salesperson using the Lookup tool
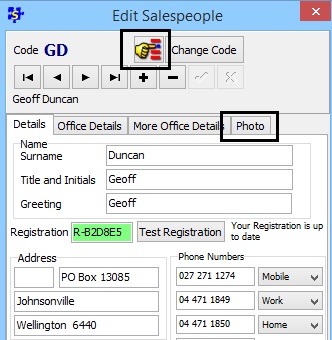
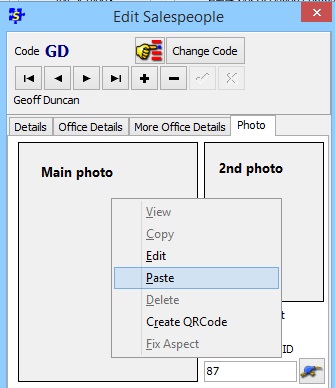
3. Open the Photo tab
3. Open the Photo tab
4. There are two options, you can:
A) Paste a photo directly into the photo panel*
B) Right click and Edit to import a photo manually.
*When you paste a photo, right click and Edit the photo in SalesPartner so you can make sure the photo size is not too large.
A) Paste a photo directly into the photo panel*
B) Right click and Edit to import a photo manually.
*When you paste a photo, right click and Edit the photo in SalesPartner so you can make sure the photo size is not too large.
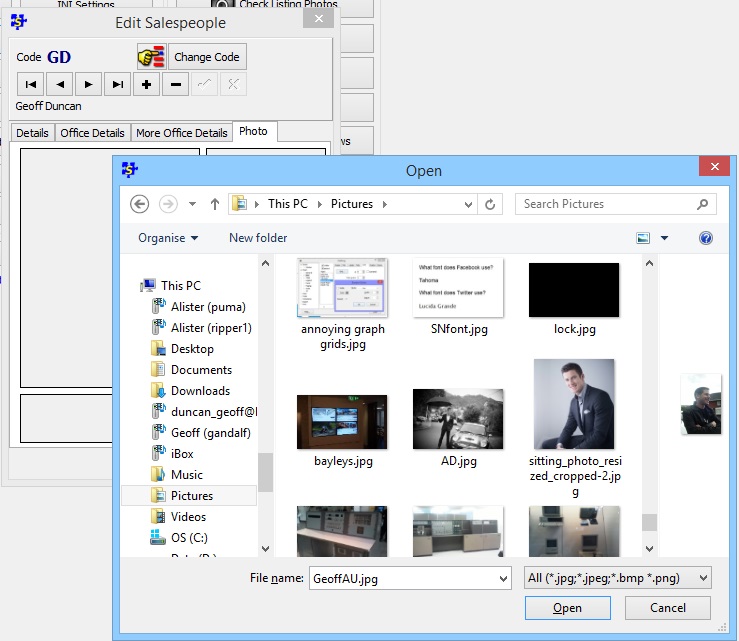
5. If no photo exists, File Explorer will automatically open so that you can locate and open the desired photo.
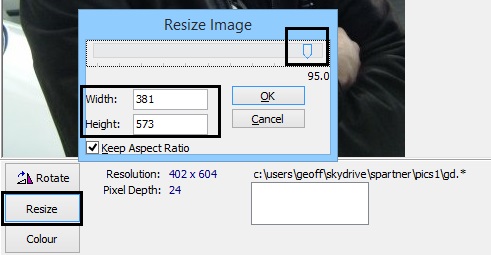
6. Most photos will need to be resized for optimal performance (printer job sizing, email attachments etc).
- Click Resize
- Drag the slider to adjust the photo resolution to approximately 400 width (the Height will be automatically adjusted to maintain the original aspect ratio)
- Click OK to save
- Click Resize
- Drag the slider to adjust the photo resolution to approximately 400 width (the Height will be automatically adjusted to maintain the original aspect ratio)
- Click OK to save
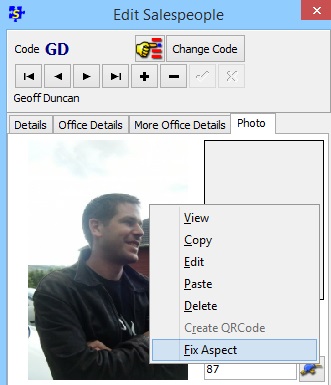
Fix Aspect Ratio7. Right click on the existing photo and select Fix Aspect to automatically fix the aspect ratio and ensure that the photo fits reports perfectly without cropping.
|
|
8. Restart SalesPartner to use your updated photo.