How to: Add a new Listing - Administrators Guide
Step 1. Create a new listing
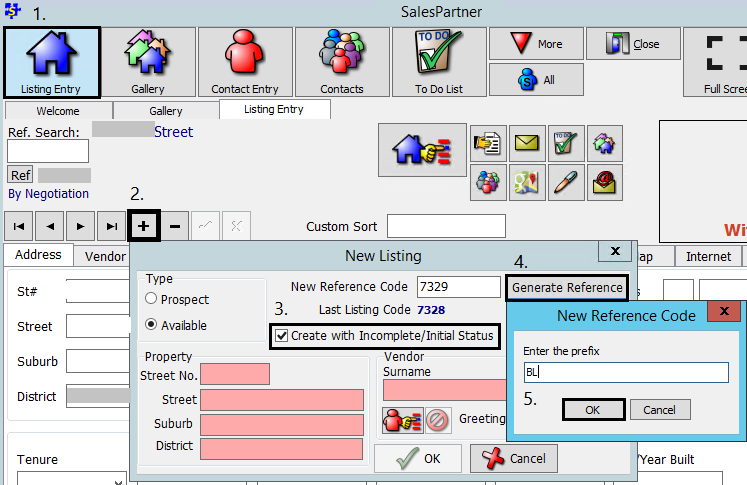
- Open Listing Entry on the main menu ribbon.
- Click Plus (+) to add a new listing
- Check Create with Incomplete/Initial Status
- Click Generate Reference
- Enter your branch/listing Prefix (for example, if your listing references are BL2200, BL2201 etc. enter 'BL' as the prefix)
- Click OK
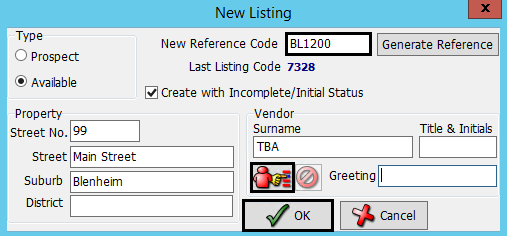
The next calculated listing reference code will be generated automatically.
- Complete the Address and Vendor fields. Tip: Use Contact Lookup to find an existing vendor/contact.
- Click OK to proceed.
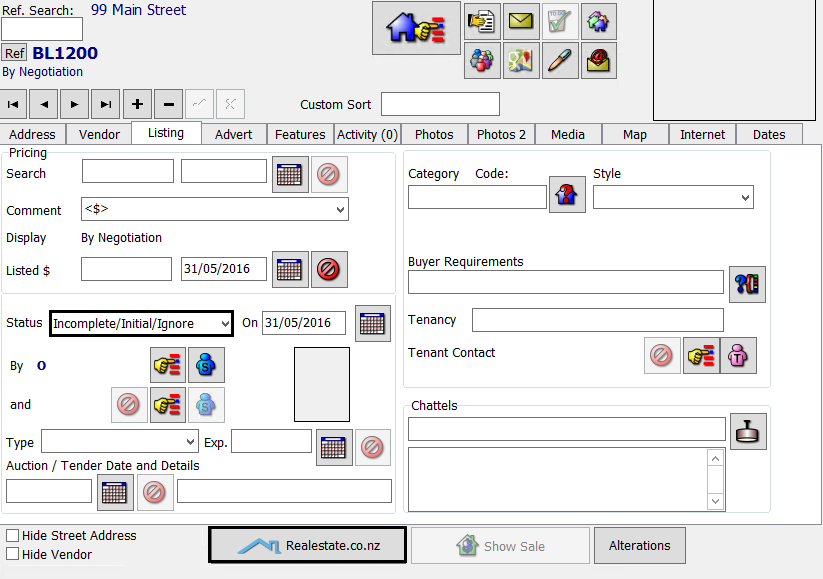
Step 2. Data Entry
- Navigate through each tab to complete the required fields.
- Note the location of the Status options in the Listing tab.
- To enter Realestate.co.nz information, use the Realestate.co.nz button.
Step 3. Import Photos / Media
- Open the Media tab
- Click Exporer to open your listing's Media folder
- On your PC, open Explorer (press Windows + E on your keyboard) and find the folder which contains your listing photos.
- Select your photos (use Ctrl + A to select all) and copy them to your clipboard.
- Paste your photos into your listing's Media folder.
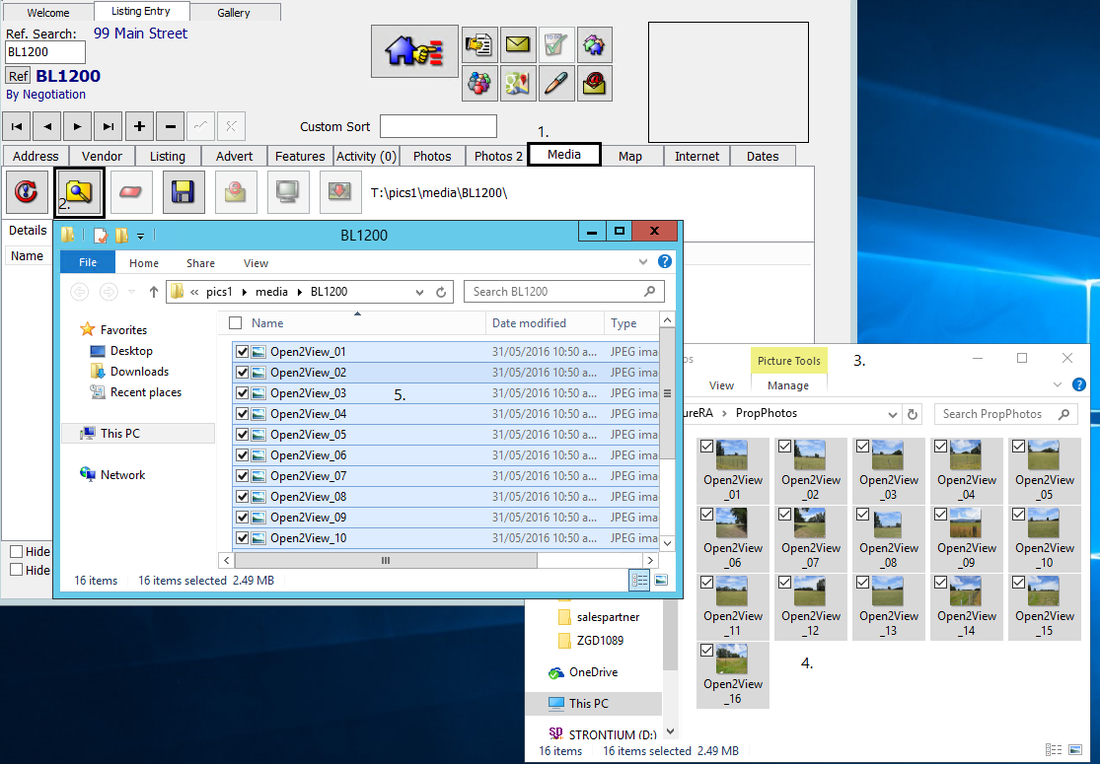
- Close your Media Explorer window
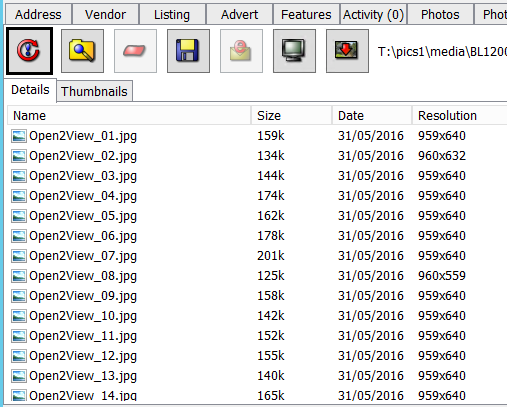
- Click Refresh
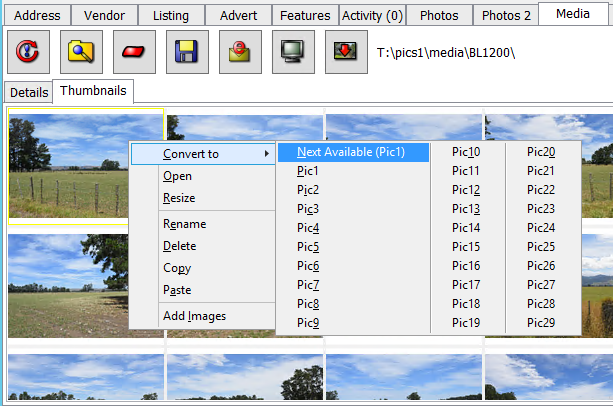
- Open Thumbnails tab to preview your photos
- Right click on a photo to use Convert to... Pic1, Pic2 etc.
Tip: Avoid importing ultra high definition images into Media. This will ensure that upload times are quick. Resize UHD photos before uploading into Media, checkout this guide: https://www.salespartner.co.nz/news/how-to-resize-photos-using-outlook