How to: Bulk Delete JPG files in Media
Delete all JPG folders from sub-folders of the media directory.
Please read through this entire guide before getting started.
This procedure is useful for freeing up server memory, as well as improving Synchro and network optimization. Typically, the majority of used storage within the Pics1 folder is located in Media. The Media folder is often comprised of hundreds, if not thousands of original resolution full HD image files. Often, an office will have duplicate copies of images stored elsewhere, however you should make a copy of the Pics1 folder as a backup (see Part 1.), to retain a record of the original folder structure.
This guide is suitable for experienced system administrators.
Part 1.
Create a backup of your Pics1 folder before proceeding - open the location of your Pics1 folder, and copy and paste the Pics1 folder (which includes Media) onto a memory stick or secure storage location / device. Ensure that enough free space is available - over 10GB is not an unusual Pics1 folder size.
You can identify the location of your Pics1 folder in SalesPartner -> More -> Settings -> INI Settings ->
The Pics1 folder is identified as shown in the PicturesDir path:
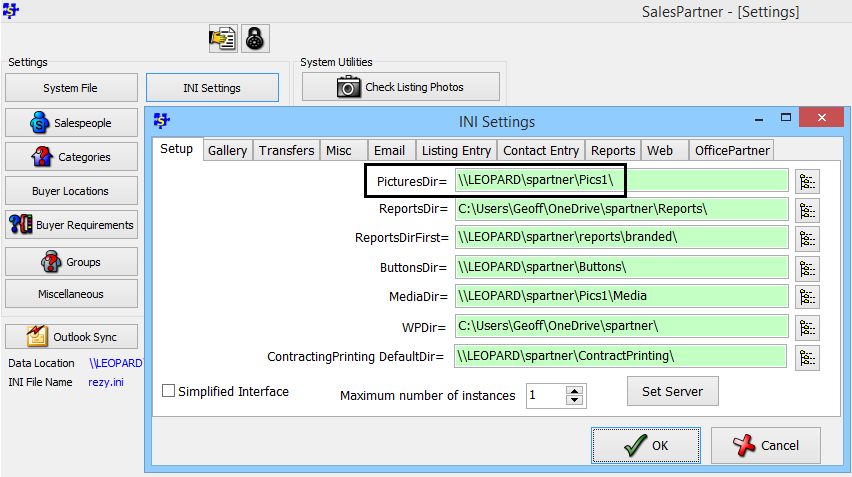
Copy the file path and paste it into (Windows) File Explorer, then press Enter.

Verify your successfully copied Media folder on your backup device before continuing.
Part 2. Deleting JPG files from Media
Open the Media folder. Tip: Here is another way to get to the Media folder: Open SalesPartner -> Listing Entry -> Media Tab -> View Folder -> Click up a level to access the parent folder: Media.
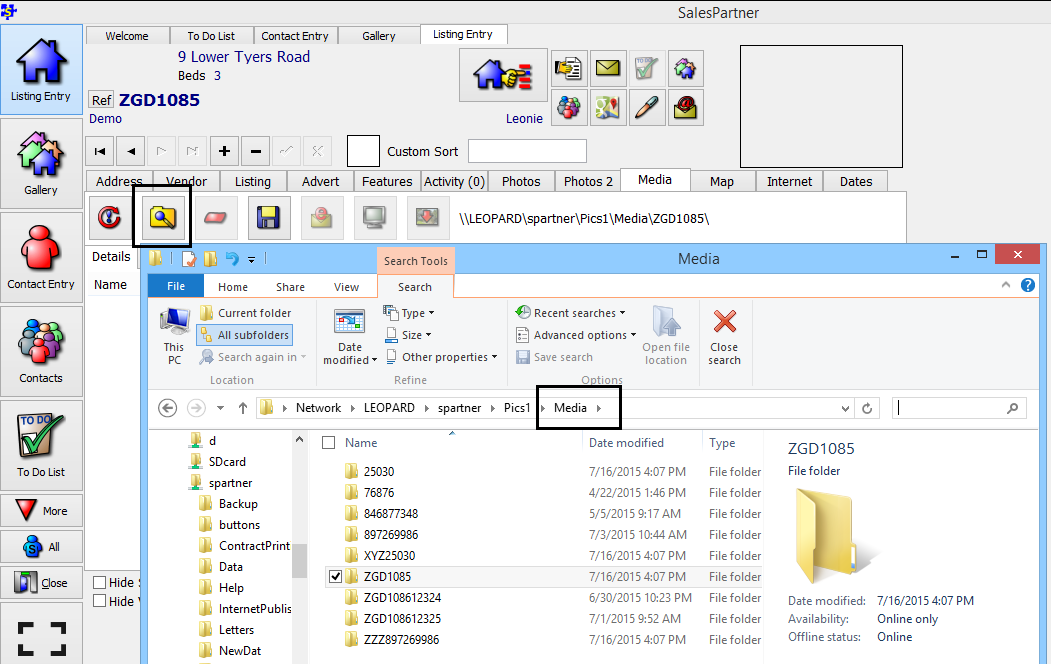
Click into the Search box (top right) and make sure all Search Tools are visible under your File Explorer Search tab.
Use Search Tools to define your search criteria:
- (search) All subfolders
- Drop down Other properties and select Type
- Enter: (type:) jpg into the search box as shown below, and press Enter
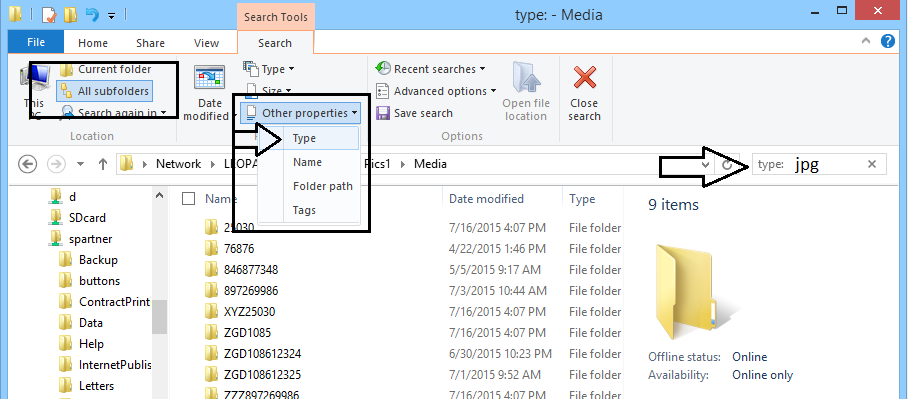
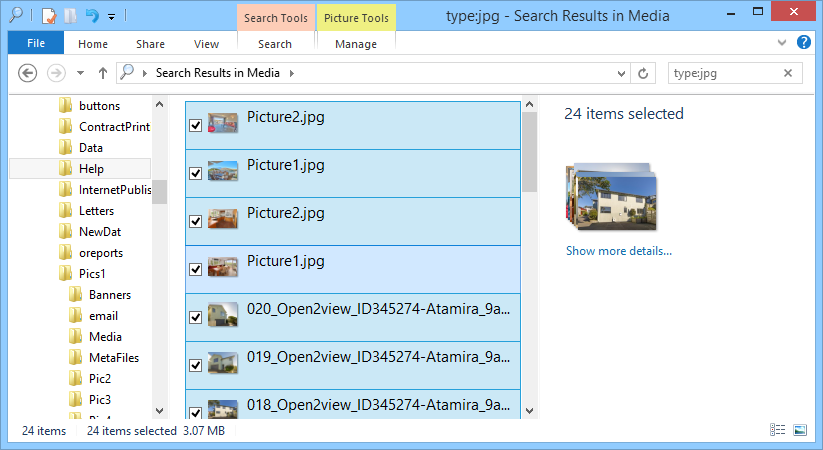
All Media folder .jpg files should be listed in the search results. Scroll through the results to check that only .jpg items are listed.
When you are satisfied that the search results are ok to delete, select an item and press Ctrl + A to select all, then right click -> delete, or press Delete on your keyboard. Search indexing and deletion may take a few moments depending on the number of existing files.
Notes:
Please contact us if you are unsure about the consequences of this procedure. Ideally, you would complete this task on the host / server PC, rather than from a networked PC. Deleted items (below a certain threshold / file number & size limit) may remain in the Recycle Bin temporarily. Ensure that you follow the steps carefully to avoid deleting document files which may be difficult to recover. Search tools, instructions and examples based on Windows 8.1.