How to: Resize Photos for Cloud
Reduce listing photo image files to a manageable size before attempting to upload them into the Cloud.
When a new listing has been entered into SalesPartner-Cloud:
Open SalesPartner-Local on your desktop
Synchronize SalesPartner. Click More -> Synchronize -> Synchronize.
Open Gallery and find the new listing.
Double click into the Listing
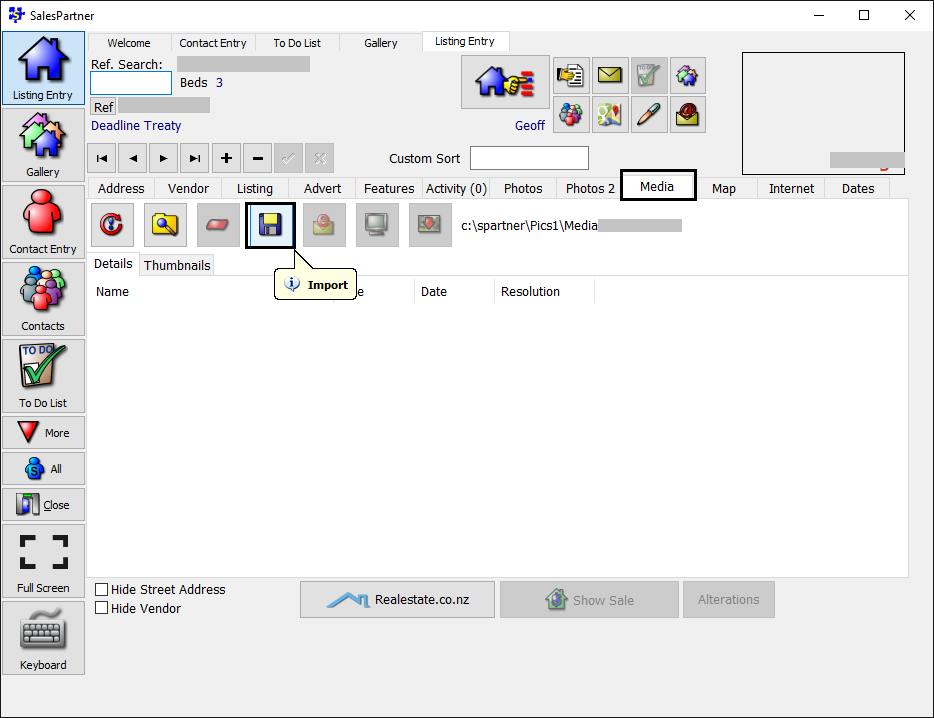
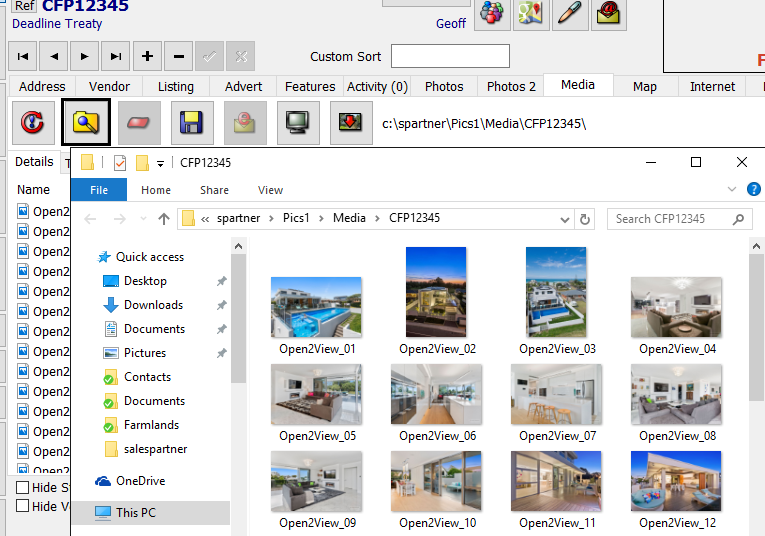
Open the Media tab and Click Import
Find the location where your original photos are stored eg, USB stick / Pictures folder.
Select the listing photos - Ctrl + A to select all
Click Open. The image files will be imported into the Media folder.
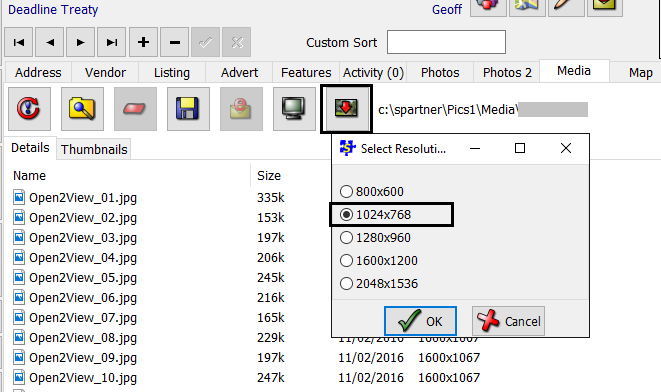
Click Down-Sample and select the desired image size, and click OK
The photos will be resized.
Click Explorer to open the folder which contains the image files
Open SalesPartner-Cloud
- Lookup the listing
- Go to the Media tab
- Click Explorer to open the empty folder
- Right click & Copy the resized photo files from the Local Media Folder
- Right click & Paste the photo files into the empty Cloud Media Folder - the photos will take a few moments to transfer.
- Click Refresh, then open the Thumbnails tab
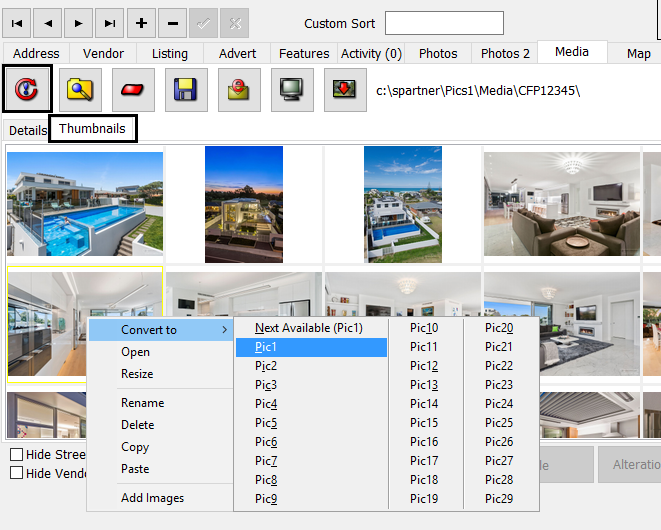
You can proceed to arrange your photos using right click -> Convert to