How to: Add a new Listing
Open Listing Entry on the main menu ribbon.
Click Plus (+) to add a new listing
Select Prospect as the Listing type. Note: only system administrators should add Available listings. The listing type Prospect can be used by system administrators when a listing is not intended to be immediately available.
When you select Prospect, the next reference code should be automatically generated using your listing prefix. In the example below 'ZGD*' is the prospect listing for the salesperson named Geoff Duncan. Your prospect listing prefix is defined in Settings -> System File. Having a unique prospect listing prefix ensures that your data is only assigned to the correct agent ID.
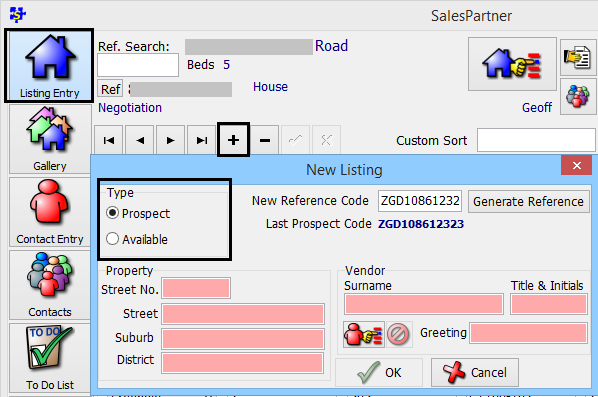
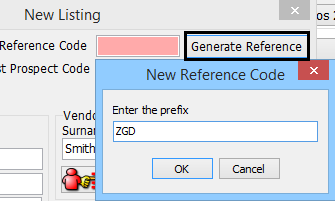
If your personal prospect listing reference number is not generated automatically, click Generate Reference.
You should only enter "Z" followed by your initials. SalesPartner will automatically allocate a listing number when you click OK.
Compulsory fields are indicated in red. You must complete the address and vendor details to proceed. If you do not know who the vendor is, you can enter To Be Advised in the Vendor Surname field. If the vendor is already loaded in SalesPartner, use the Vendor Lookup tool to look them up.
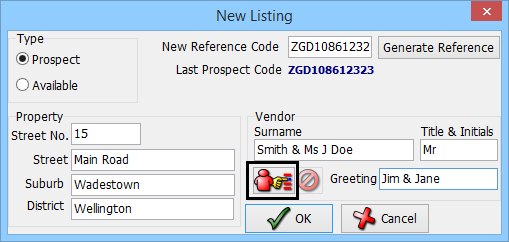
Tip: In this example, the vendors have different last names. In this situation, the second vendor's title and surname are entered following the first vendor's surname as shown. This method allows you to use surname lookup to find both names, and also publish address details correctly.
Enter both vendor's first names into the Greeting field. The greeting field is used in letters to merge after 'Dear (Jim & Jane)'.
When the compulsory fields are complete, click OK to continue.
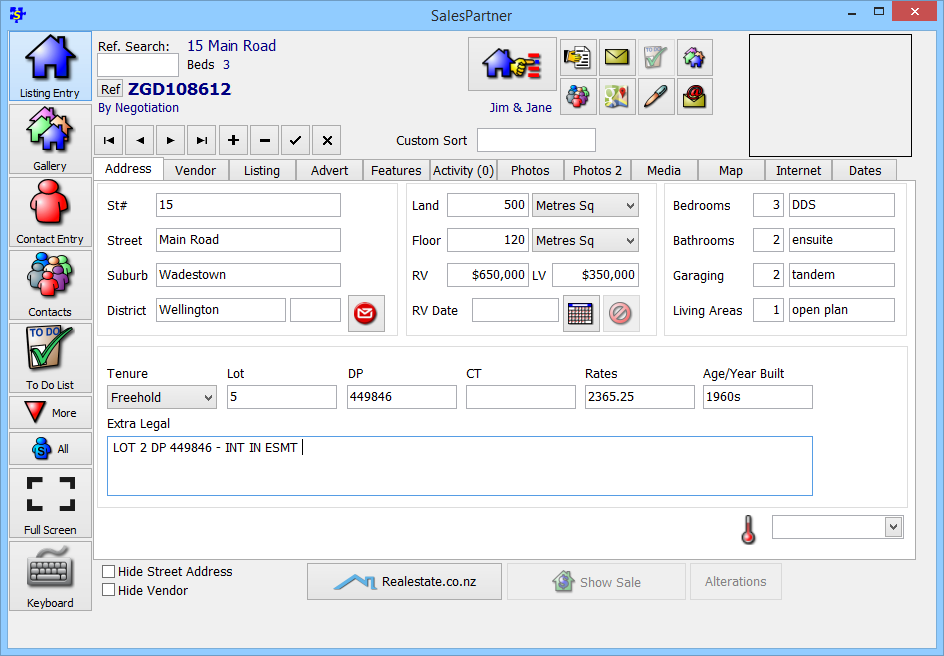
Enter listing address data
Complete as many fields as possible under the Address tab. Use council websites and property databases to source any available information.
In the Bedrooms comment field use 'DDS' to indicate two doubles and one single bedroom.
Include legal comments in the Extra Legal field.
Vendor details
Complete all fields under the Vendor tab, especially the Legal Name field. Address Name (If not Title & Surname) is not commonly used, except to override Title and Initials when printing addressed mail.
In the phone details fields, you can add a vendor's first name or initial to indicate whose mobile number it is.
The Comment field is normally used to describe the vendor's motivation and reason for selling.
The vendor's address will automatically populate with the listing's address, but you can update their address here if they do not live in the property.

Tip: To add complex address details including PO Box information, and multiple email addresses, click View Vendor to update their contact entry data.

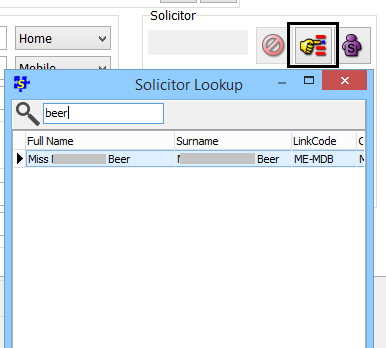
Solicitor
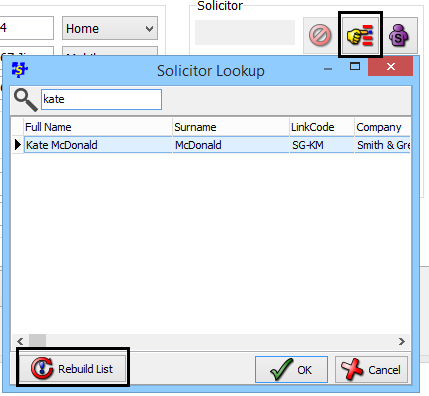
Use the Lookup tool to check if the vendor's solicitor is already in the database.
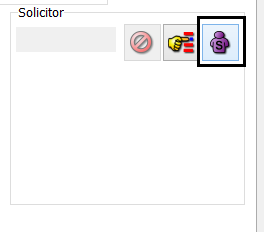
If the vendor's solicitor is not in the database, click View Solicitor to add a solicitor.
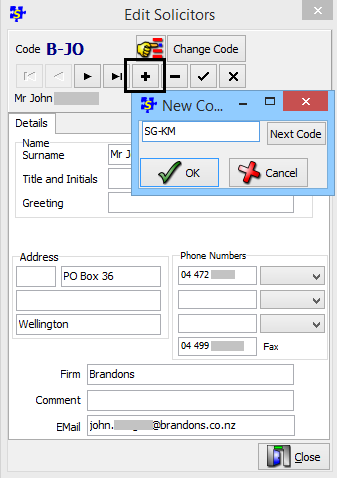
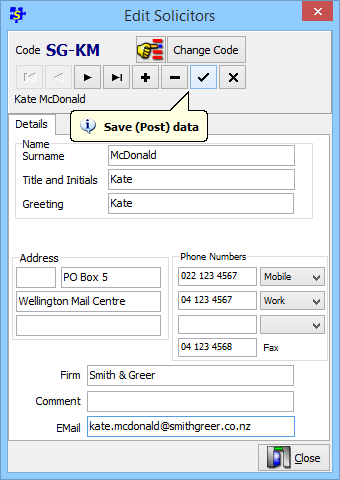
Click Plus (+) to add a new solicitor
Solicitor codes start with the initials of the firm, followed by a dash, then the initials of the solicitor. For Kate McDonald of Smith & Greer, the code will be SG-KM.
Complete all fields and click the tick button to save before clicking Close.
|
|
You can now Lookup* your new solicitor. *Important: Click Rebuild List to refresh and display new solicitors in search results.
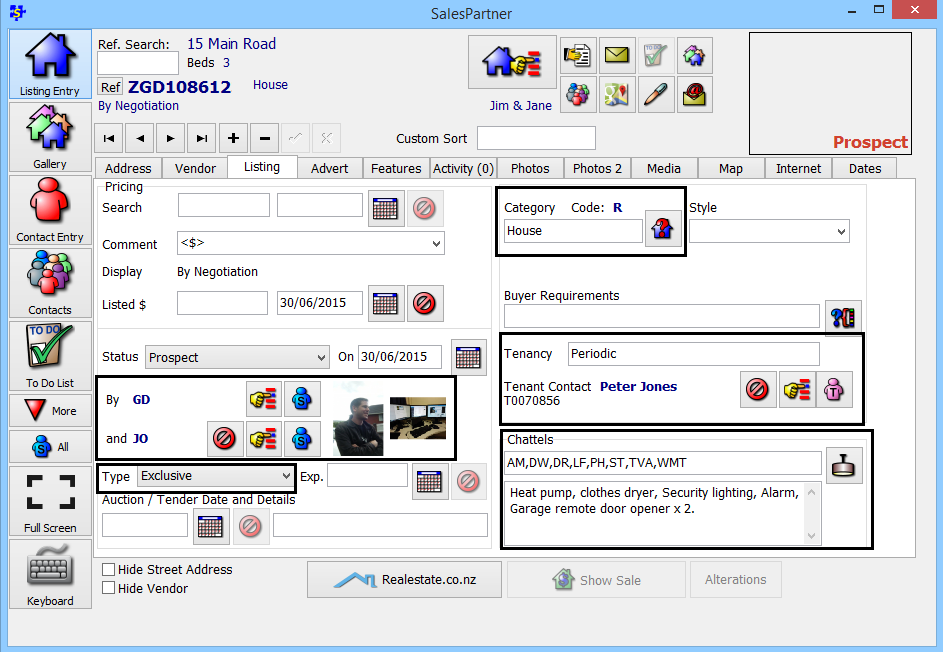
Listing tab
Select a Category
Enter Tenant details (if any). Adding tenants is similar to adding a solicitor, except that SalesPartner will assign the code automatically.
Enter standard Chattels as well as Extra Chattels
Assign a second agent using Lookup agent if required
Select a Listing Type e.g. Exclusive
Features Tab
This section describes how to complete features data for the purposes of merging a Listing Authority Agreement.
Click Edit Features
In the Interior tab, complete these fields: Water Heating, Heating
In the Exterior tab, complete these fields: Cladding, Roof, View, Fencing, Aspect