If you have a logo or style guide that requires certain colours for your flyers or window cards, you can create elements with custom colours to closely match your specifications.
In this example we'll add a flyer banner background and match the custom colour to a supplied logo.
Step 1. Microsoft Paint
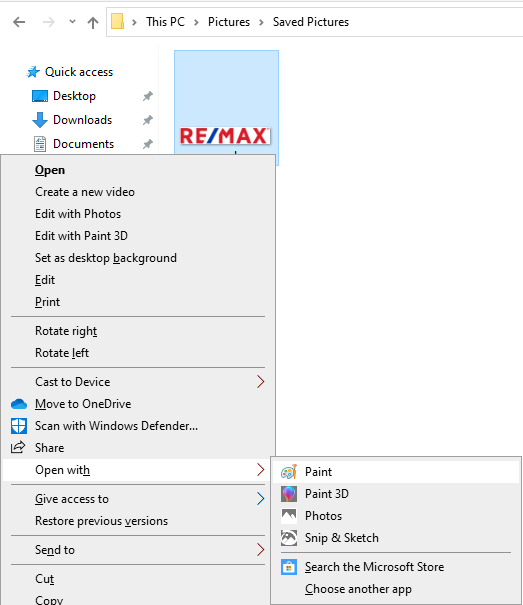
Locate your example logo or graphic and right click, open with > Paint. Tip: Use Ctrl+PrtScn to snapshot your screen if you want to copy a sample from a google image search and then paste that into MS Paint.
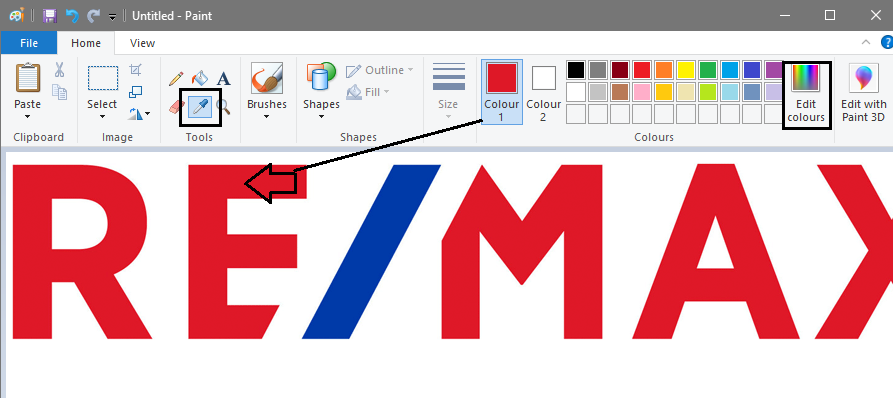
In Tools select the dropper and then click on the area you wish to colour match. The colour will appear in the Colour 1 panel. Click Edit colours
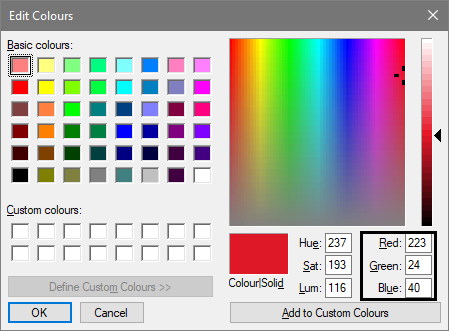
In Edit colours, make a note of the RGB codes for your custom colour. These codes will be used to colour match the element in SalesPartner.
Editing an element in SalesPartner
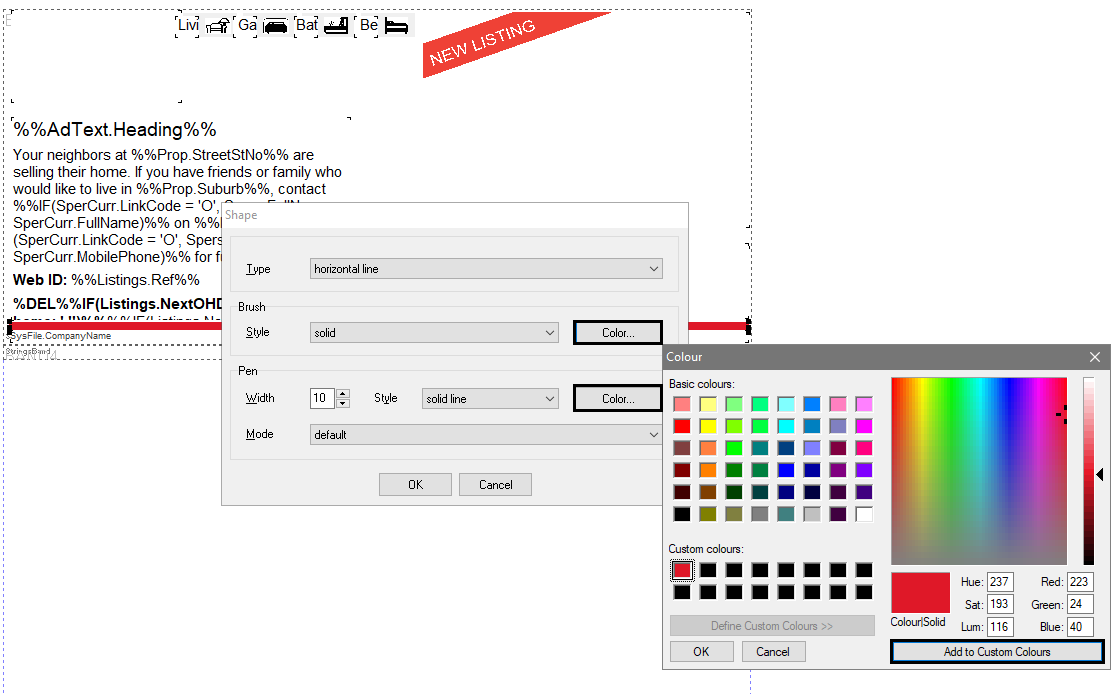
Bring up your custom report in edit mode and double click into the object you wish to colour match. Note you can create a new object using the tools in the left hand menu. Open the Color menu and in Define Custom Colours enter your RGB (Red, Green, Blue) codes you obtained from Paint.
Click Add to Custom Colours and then select your new custom colour and click OK. Repeat this step for both shape Color menus to ensure that the border as well as the fill use the same custom colour.
 RSS Feed