|
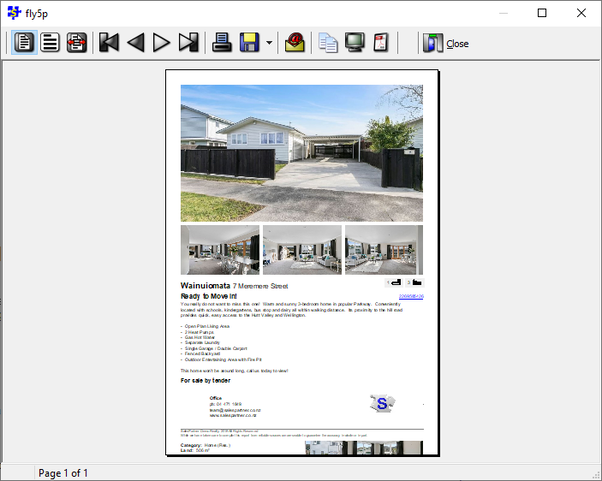
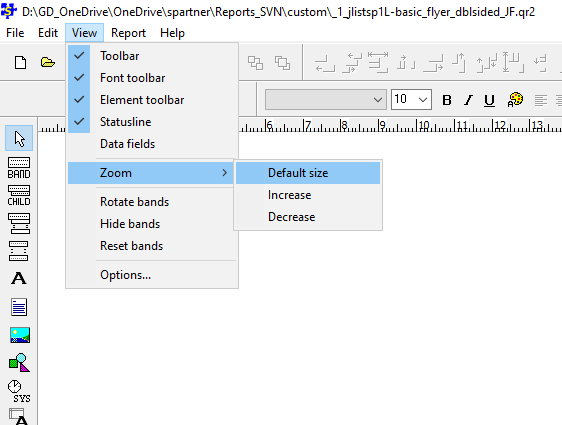
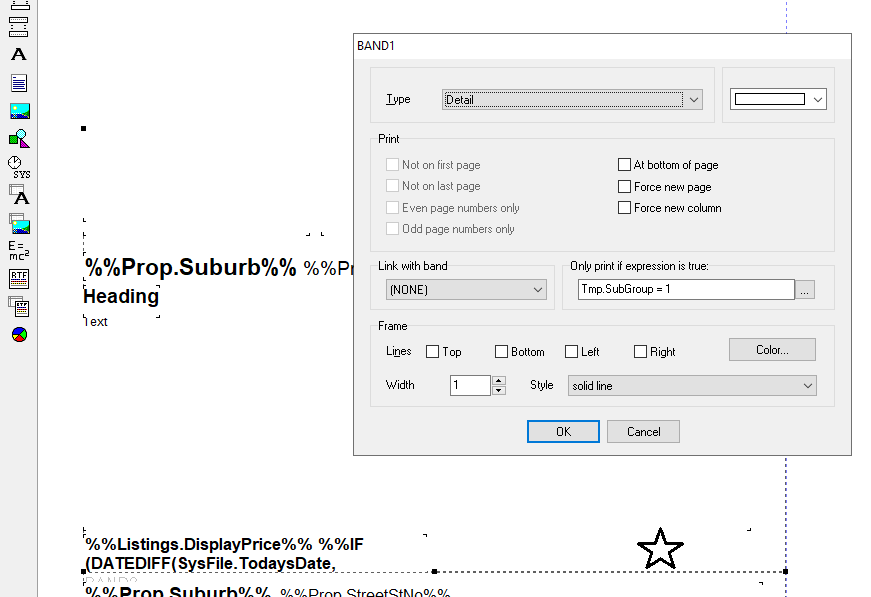
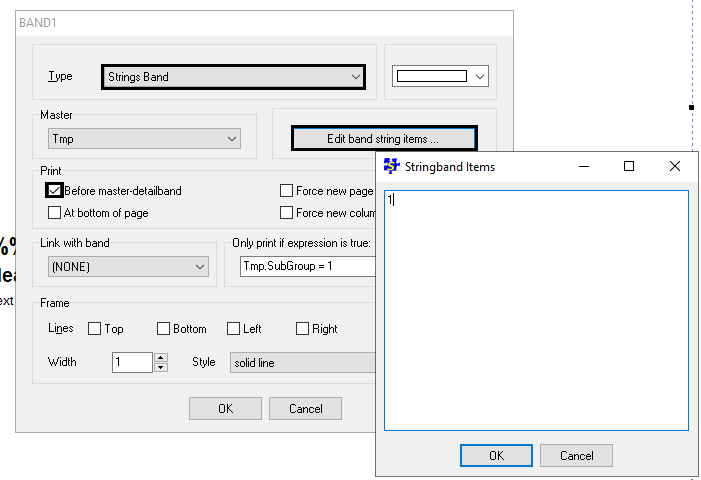
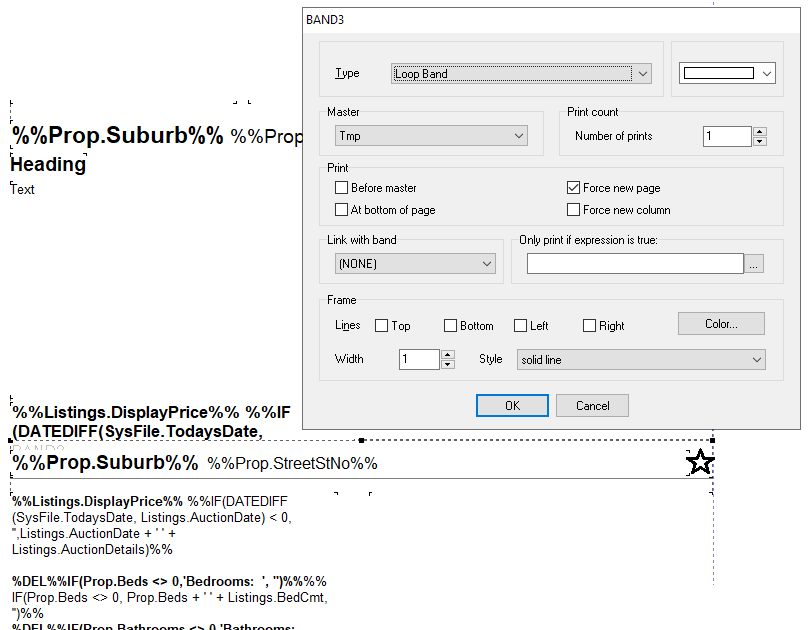
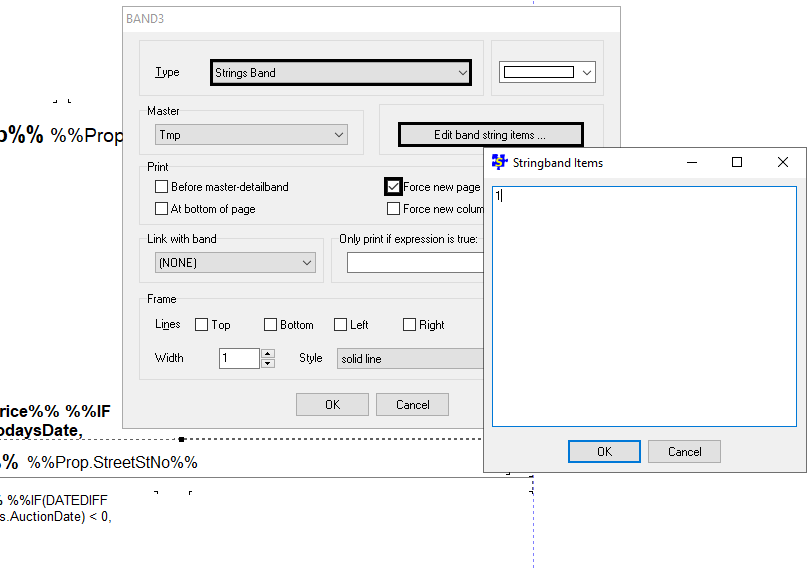
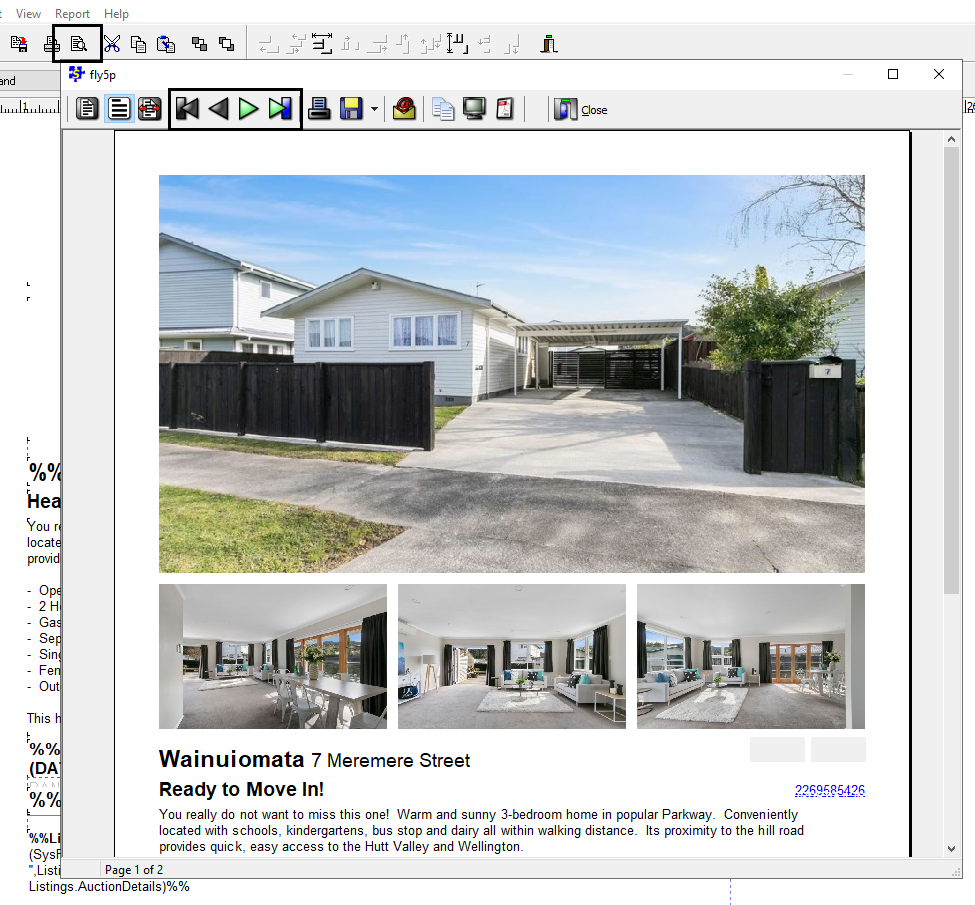
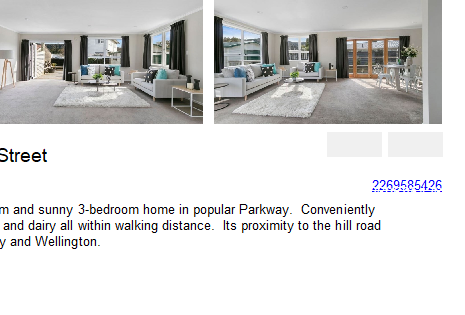
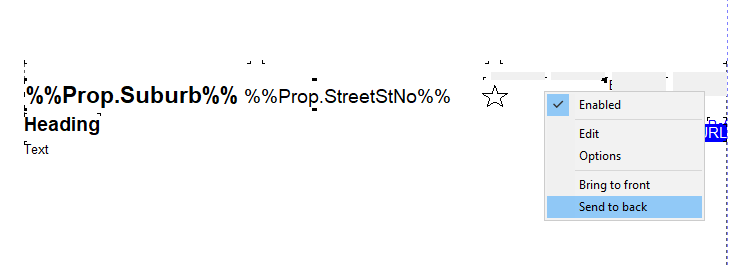
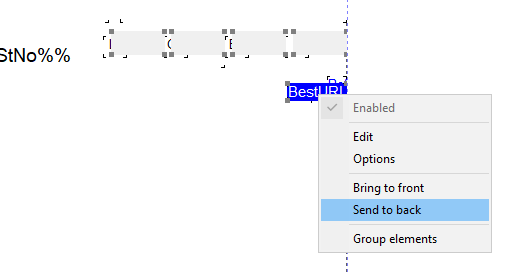
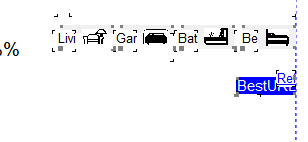
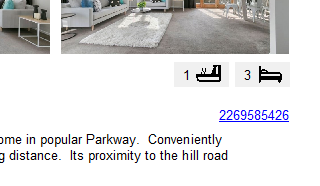
Sometimes a legacy custom report template from version 11 may need to be tweaked to work correctly in version 12 or 14. The common issues are: double sided reports not paginating, and hidden icons. In this walk-through we'll look at how to fix these problems. 1. A double sided report only shows the first page. This custom double sided report is only showing the first page. The second page's content can be seen running on directly from the footer at the bottom edge. The menu arrows for toggling pages should not be greyed out. In edit mode, open View, Zoom, and select Default size. First we will adjust the band for page one. To do so, double click on an empty area of the first page where there are no elements or merge fields. For this template the star indicates an empty space at the bottom of the template where you can double click to show the page's band settings. Drop down the band Type and select Strings band. In Edit band string items enter 1 and click OK. Under Print tick Before master-detailband. Click OK to save the band settings. Next we'll edit the band settings for the second page. For this template we can double click on the empty area indicated by the star below. Note: for other templates you may need to temporarily extend the report length to reveal an empty area (using the Report Options tab). Change the band Type to Strings Band and tick Force new page. In Edit band string items, enter 1 and click OK. Click OK to save the band options. Now preview the report to confirm that the page toggle buttons are enabled and the template is paginating correctly. Note that the bedroom and bathroom icons are not showing correctly, and the blue reference code is distorted - we'll fix these issues next in part 2. 2. The bedroom and bathroom icons are not showing. In this example the layering of the bedroom, bathroom and garaging icon background shadows has become disordered. Also for many standard SalesPartner reports an invisible (white coloured text) hyperlink is embedded behind the listing's reference code. This means that when the report is viewed as a PDF, you can click on the reference to view more details. In the example below the transparent hyperlink text is incorrectly layered on top of the reference ID. In edit mode first we notice that the Address expression field is overlapping the icons, so that must be sent to back first. Right-click the address expression element and click Send to back. Now we can select and sent to back multiple items (the four grey icon shadows, and the hyperlink element). Press and hold the Shift key as you left-click each item so that they are selected - note the grey border points. Then right click a selected item and Sent to back to re-order all selected elements. Now you'll see the icons are placed on top of the shadows and the report is ready to preview / save.
0 Comments
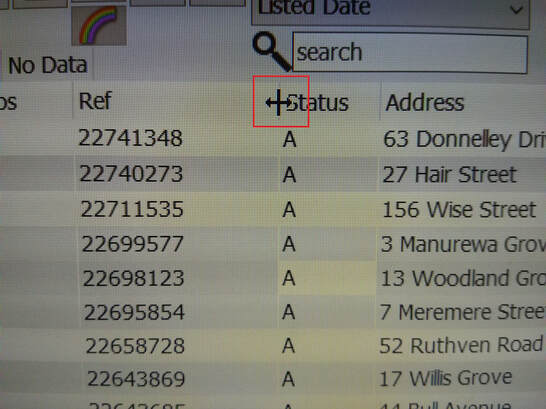
You can drag and drop column heading dividers in SalesPartner. In any grid or spreadsheet style screen hover your mouse over the column header divider until your cursor shows as a cross with horizontal arrows. Then drag and drop the divider to resize the column width. Column size preferences are saved automatically for future sessions. The column widths are adjustable for these grids in SalesPartner:
You can also reposition an entire column by dragging the header and dropping it into the desired location. See also:
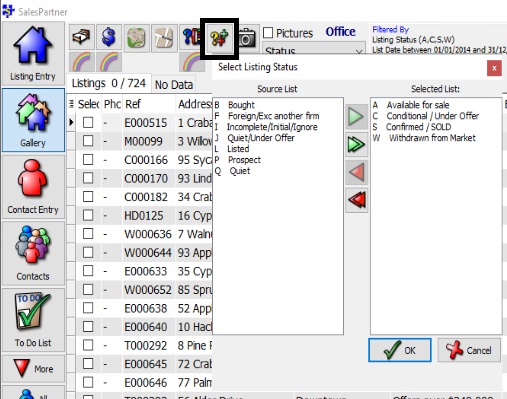
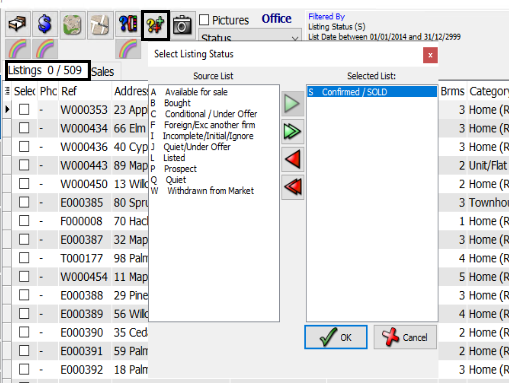
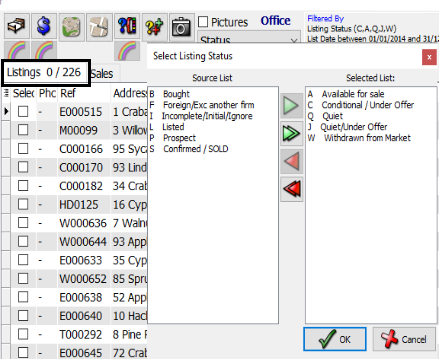
Question: To fulfill our Anti Money Laundering obligations we need to find out how many listings we have had since January 2014 and how many sales. Is there a simple way to get this out of SalesPartner? Solution: Open the Gallery and click into Other Selections > Status. Drag and drop or double click on a status from the left hand source list to add it into the Selected list on the right. For this scenario (find all listings and sales in a date range) you would include:
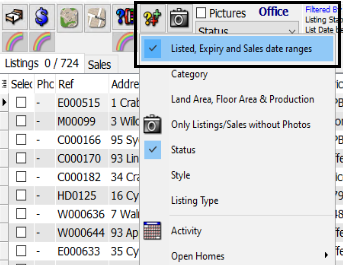
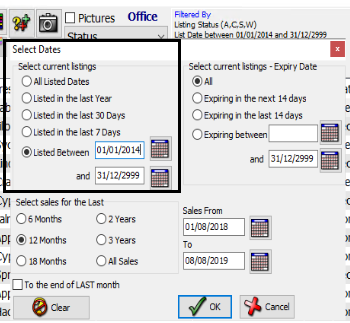
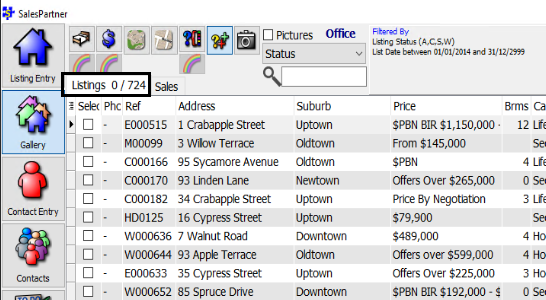
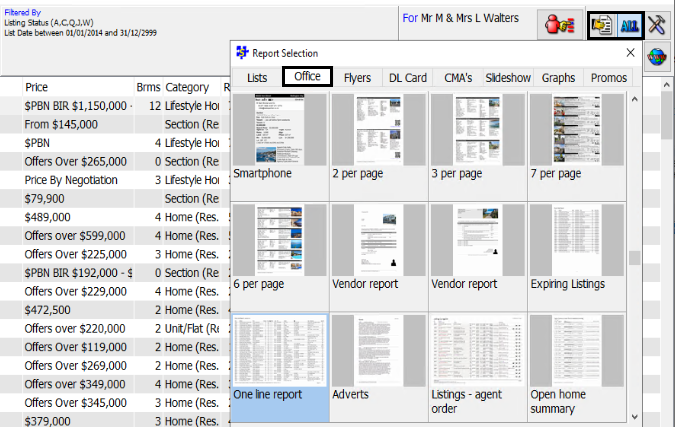
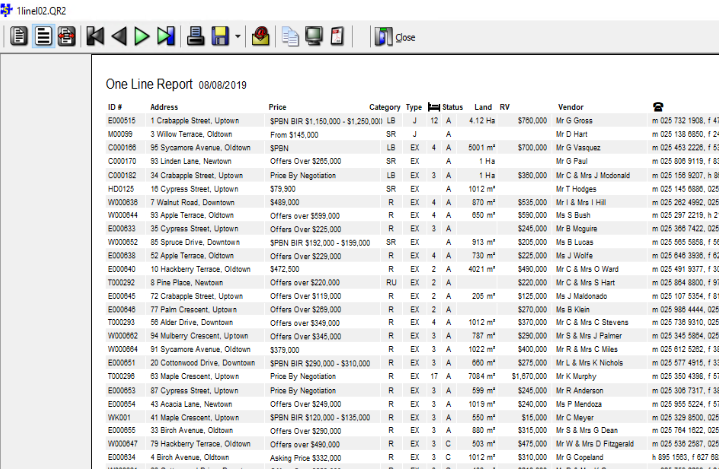
Click OK then open Other Selections > Listed, Expiry, Sales date ranges. In the Select current listings panel, enter the required start date and click OK. Note: because we previously enabled withdrawn and sold listings the date filter will apply for listings as well as sales. Using the gallery tab counter we can see that 714 listings and sales have been entered in the date range. Totals by status Use the status filter from step one to obtain totals for sales only, or determine the total number of listings including withdrawn and quiet listings. In this sample data there have been 509 sales entered between 01/01/2014 - present. There have been 226 listings entered including quiet, conditional, and withdrawn listings. To print a report of the filtered lists, click All > Print Reports and under the Office Tab, double click One Line Report.
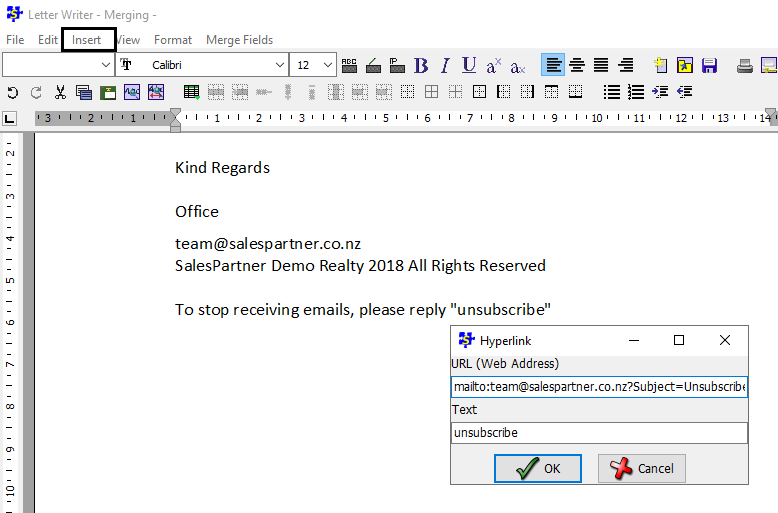
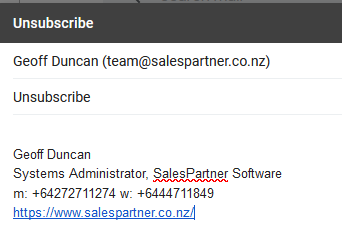
To streamline the opt-out process for your email recipients, you can hyperlink your unsubscribe instructions so that clients can opt-out more easily. By using the mailto: link formula we can populate an email on their behalf with your email address and the subject line for example 'unsubscribe' already filled out. Here is the hyperlink text to create an unsubscribe button for team@salespartner.co.nz with the subject line 'Unsubscribe' mailto:team@salespartner.co.nz?Subject=Unsubscribe To use it yourself simply replace the email address segment of the script with your own email address. To create an unsubscribe link in SalesPartner, edit a letter template and select the unsubscribe text you wish to link. Click Insert > Hyperlink then paste the script above into the URL line (ensuring that your own email is entered between mailto: and ?subject...). Then save the template and send a test email to yourself to try it out. When you click on your unsubscribe link, it should open a new email reply with the subject line filled out as below:.
|
Admin
|

|
|
"SalesPartner helps me extract maximum value from my
biggest asset - my database". Andrew Duncan www.agentmonday.com |
SalesPartner Software - established in 1993
Leading-edge software for real estate salespeople
Leading-edge software for real estate salespeople
 RSS Feed
