Sometimes a legacy custom report template from version 11 may need to be tweaked to work correctly in version 12 or 14. The common issues are: double sided reports not paginating, and hidden icons. In this walk-through we'll look at how to fix these problems.
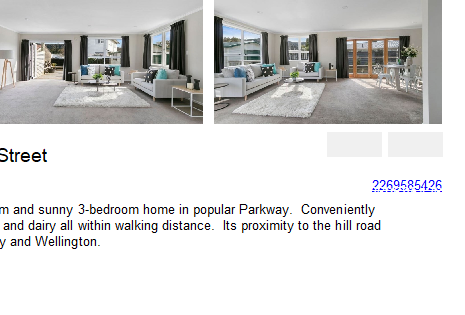
1. A double sided report only shows the first page.
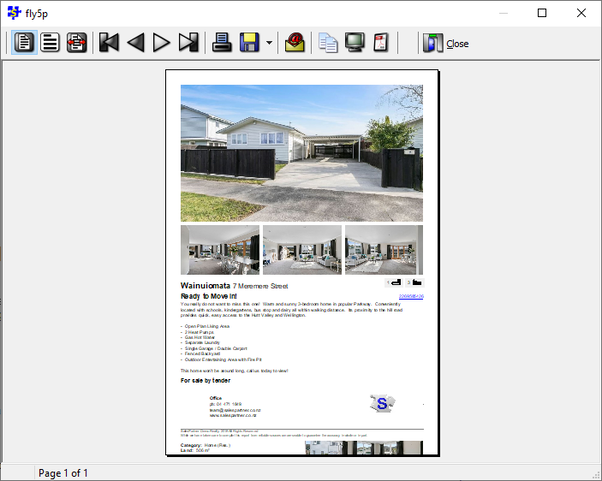
This custom double sided report is only showing the first page. The second page's content can be seen running on directly from the footer at the bottom edge. The menu arrows for toggling pages should not be greyed out.
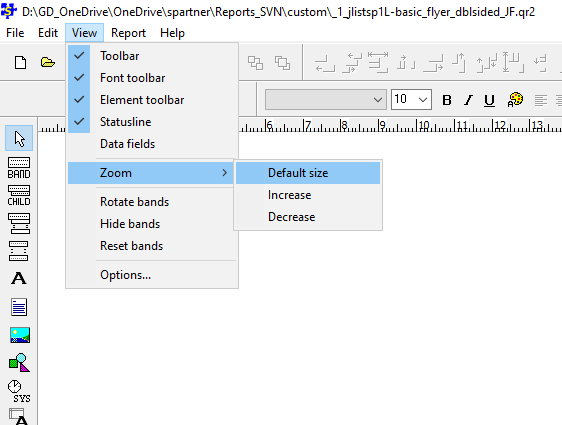
In edit mode, open View, Zoom, and select Default size.
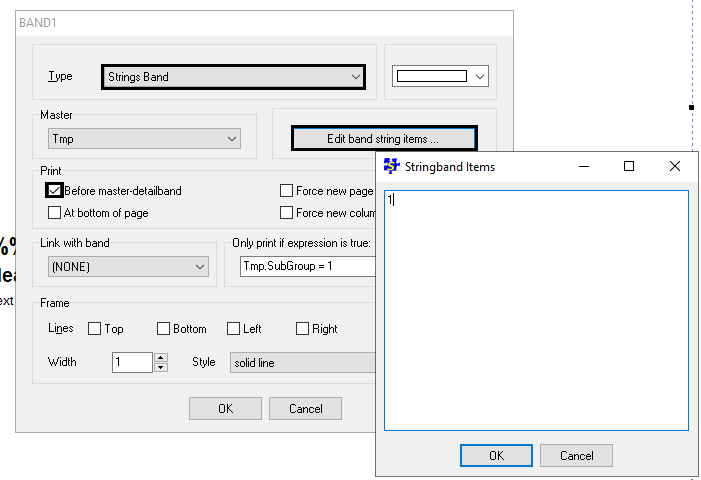
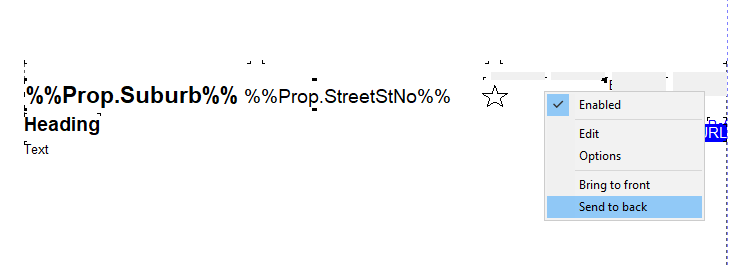
First we will adjust the band for page one. To do so, double click on an empty area of the first page where there are no elements or merge fields. For this template the star indicates an empty space at the bottom of the template where you can double click to show the page's band settings.
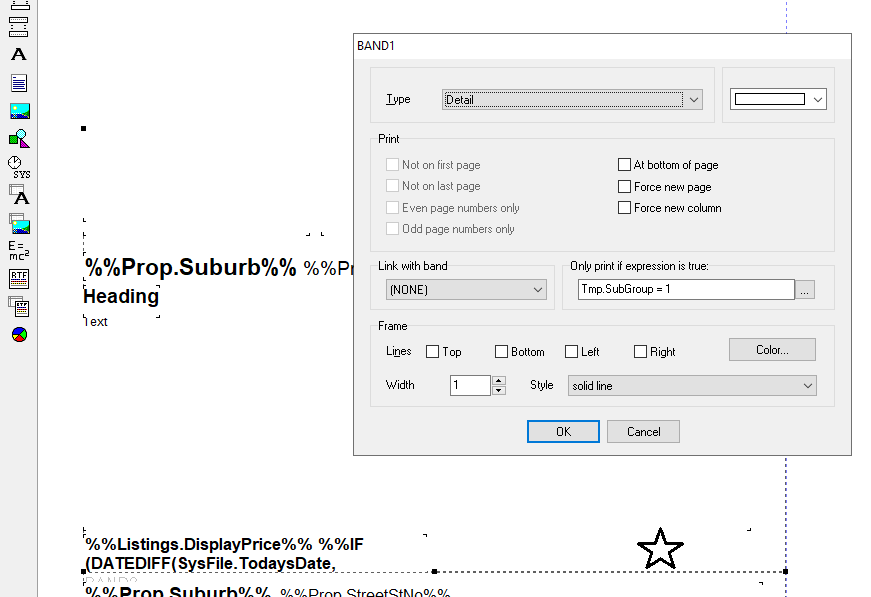
Drop down the band Type and select Strings band. In Edit band string items enter 1 and click OK. Under Print tick Before master-detailband. Click OK to save the band settings.
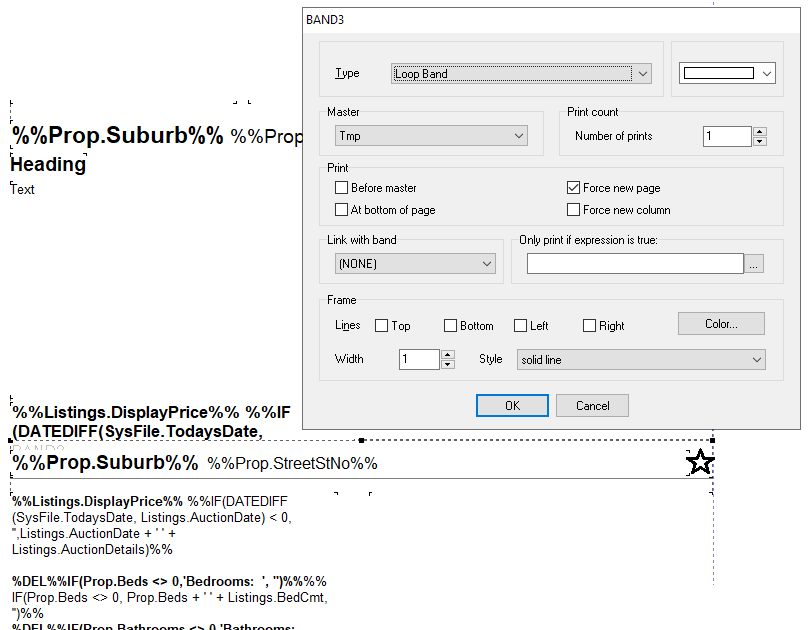
Next we'll edit the band settings for the second page. For this template we can double click on the empty area indicated by the star below. Note: for other templates you may need to temporarily extend the report length to reveal an empty area (using the Report Options tab).
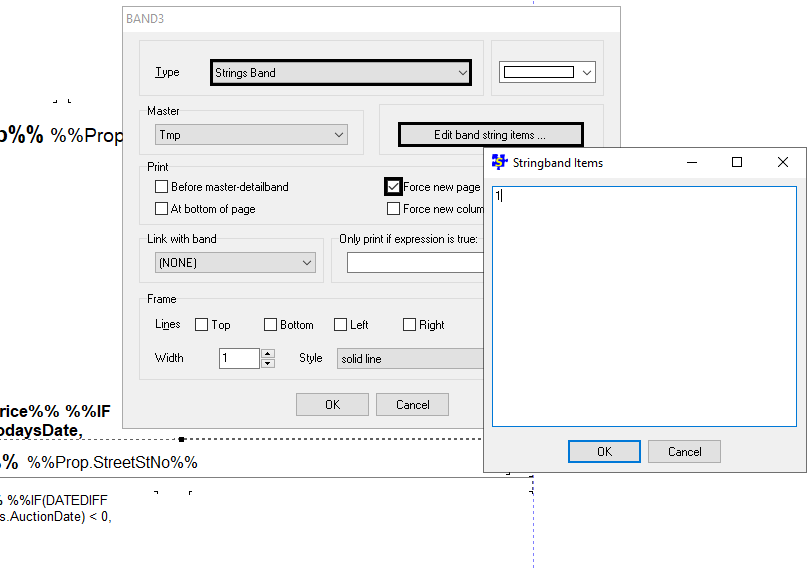
Change the band Type to Strings Band and tick Force new page. In Edit band string items, enter 1 and click OK. Click OK to save the band options.
Now preview the report to confirm that the page toggle buttons are enabled and the template is paginating correctly.
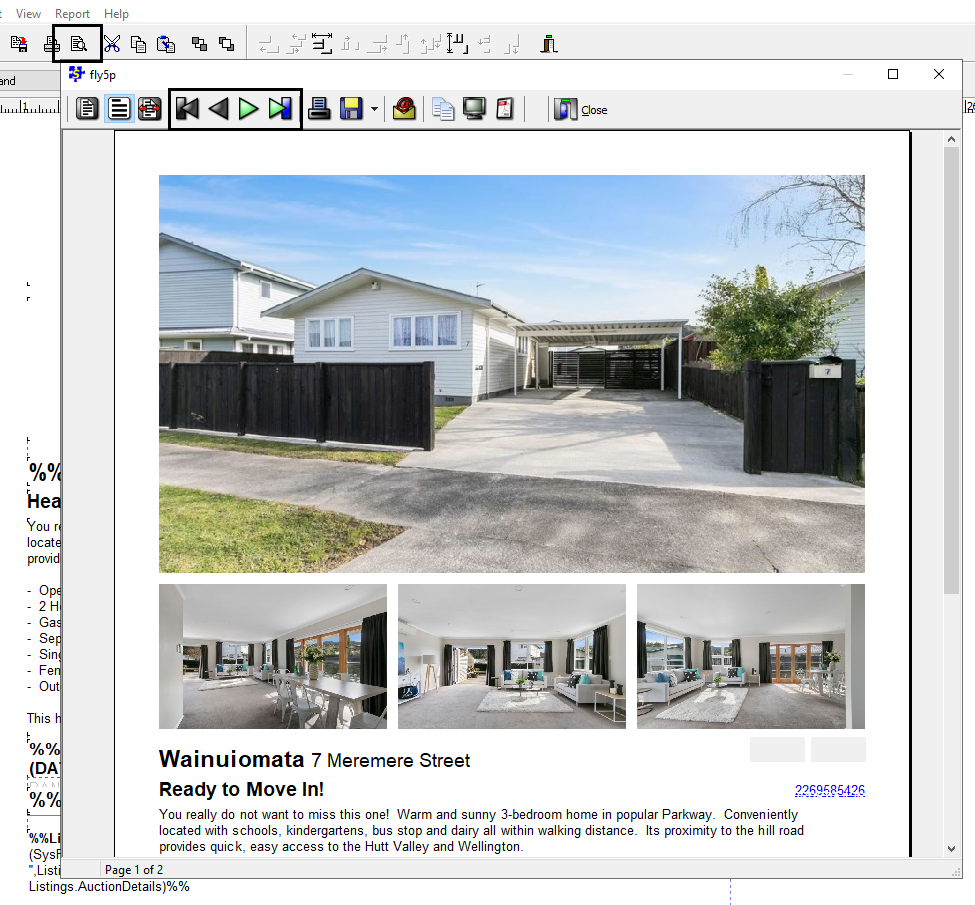
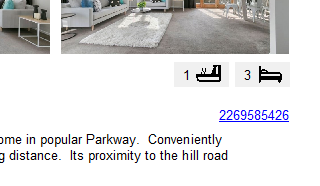
Note that the bedroom and bathroom icons are not showing correctly, and the blue reference code is distorted - we'll fix these issues next in part 2.
2. The bedroom and bathroom icons are not showing.
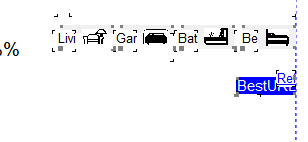
In this example the layering of the bedroom, bathroom and garaging icon background shadows has become disordered. Also for many standard SalesPartner reports an invisible (white coloured text) hyperlink is embedded behind the listing's reference code. This means that when the report is viewed as a PDF, you can click on the reference to view more details. In the example below the transparent hyperlink text is incorrectly layered on top of the reference ID.
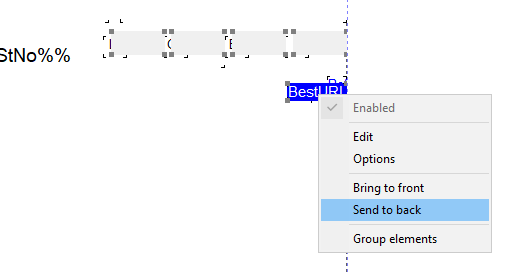
In edit mode first we notice that the Address expression field is overlapping the icons, so that must be sent to back first. Right-click the address expression element and click Send to back.
Now we can select and sent to back multiple items (the four grey icon shadows, and the hyperlink element). Press and hold the Shift key as you left-click each item so that they are selected - note the grey border points. Then right click a selected item and Sent to back to re-order all selected elements.
Now you'll see the icons are placed on top of the shadows and the report is ready to preview / save.
 RSS Feed