You can import listings from an Excel CSV file into SalesPartner, from More > Import Data > Listings > From CSV.
Imported vendors are assigned a surname 'Imported' automatically, to ensure that blank vendors are not created.
If your source file includes vendor surnames, there are some additional steps required to import the surnames and bypass the protection mechanism.
This procedure should be performed in a lab environment, not production. Backup SalesPartner and restore your data into another workstation.
Import the listings, and match the vendor surname field into a placeholder field such as Legal Name.
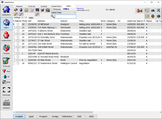
Open Contacts and expose the Other status to display your new vendors who will have 'Imported' as their surname. Use Tools > Advanced Tools > Give Code to assign LinkCodes to these vendors.
Export the vendors as a CSV file from Contacts > Tools > Export Contacts. Use Add All Fields to create columns for every SalesPartner contact field.
Open your new contact.csv file in Excel and replace the Surname field contents ('imported') with the contents of your placeholder field (the actual vendor surnames).
Close SalesPartner and open SalesPartner Utilities > Advanced > Restore Blank Data > Contact > Restore Data File. Note: at this point the existing contact database is destroyed.
The Code field is used to connect the vendors to their listings, but this field is not available for mapping in the contact import tool (to defend the database from being corrupted). However the match file can be manually modified to map the Code field.
Open SalesPartner > More > Import Contact CSV. Select your CSV file and click Match Fields.
Contact.Code field will be unmatched. Click Save Match, and save the match file to your PC.
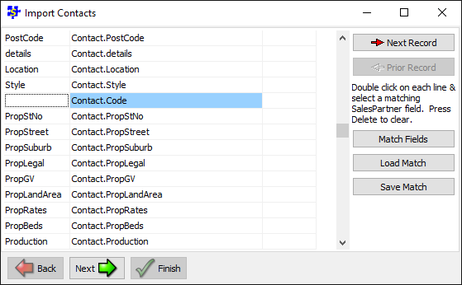
The Match will be saved as a file with no extension. Right click and Open with Notepad. Type 'Code' on the Contact.Code line, then Save - not as .txt, use the 'All Files' drop down option to replace the existing Match file.
Back in SalesPartner > Import Contact CSV. Click Load Match to select your modified Match file, and check that the Contact.Code row is matched.
Proceed and import your contacts, then confirm that the vendors have been imported and assigned correctly to their listings.
To shift these listings and vendors back into your production environment, setup a synchronization connection to transfer the data. You can use the Reference Filter field to transfer only the desired listings - paste a comma separated list of references into the Reference Filter field, in batches of up to 250 listings per event.
 RSS Feed