Follow these steps to add a new server address option or modify your existing server address options.
1. Add a new server option:
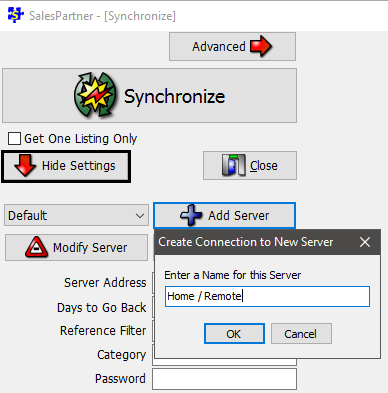
Click More -> Synchronize
Click Settings -> Add Server
Enter a name for the server for example: 'Home / Remote' (If you are adding a public IP/Server address to be used from outside your office network).
Click OK
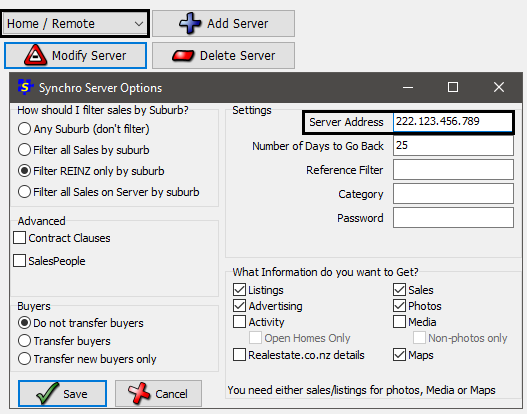
Next, use the Drop Down menu to select your new server, and click Modify Server
In Synchro Server Options, you can configure your settings and enter your Server Address. For example, if you've been given a Public IP address, enter 222.123.456.789. Or your address may be configured with DNS, for example: office.dyndns.org
Click Save
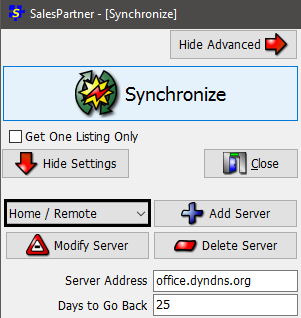
Your new Server Address will now be available in the Settings -> Drop Down Menu
Notes: Remember to click Modify Server if you wish to save changes to settings, including the Server Address. If you are not able to synchronize remotely (from home), contact SalesPartner for more information. SalesPartner-Cloud users typically only require one synchronization address. A Static IP may be required for remote synchronization.
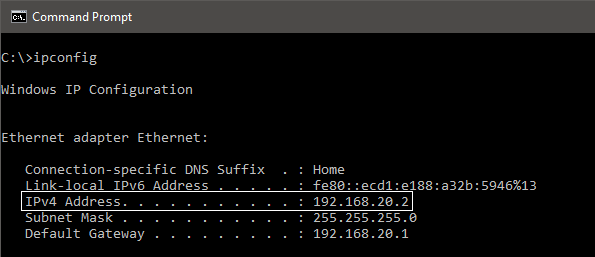
Synchronization on your Local Area Network (Office Connection): Use the name of the server PC as your Server Address, or open a Command Prompt window on the server, and run ipconfig to locate the IPv4 Address of the Server PC. You can use this IP as your synchronization address when you are connected to your office's local network.
 RSS Feed